
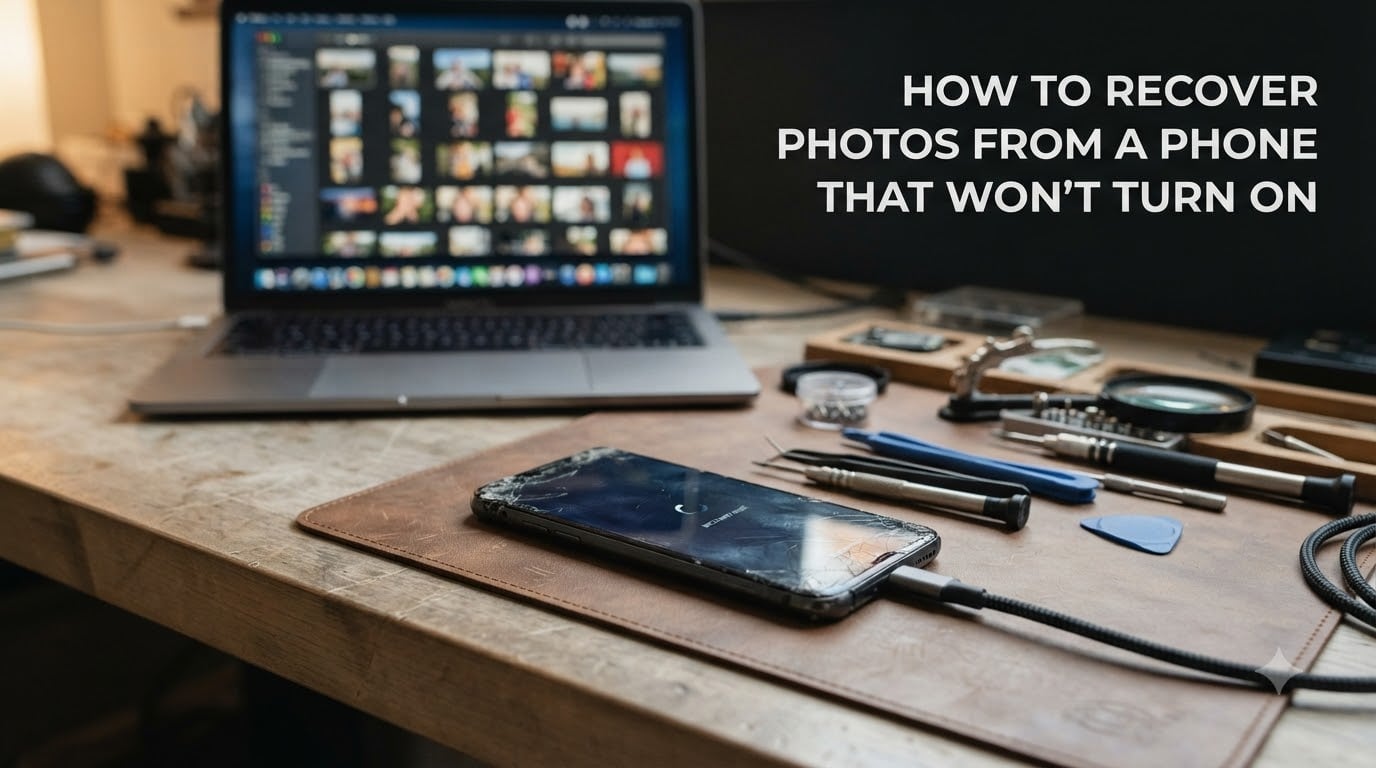
Your phone just died. It won’t respond to the power button, won’t charge, won’t show a flicker of life. And every photo you care about — family memories, vacation shots, important documents — feels trapped inside a black screen. Take a breath. In most cases, your photos are not lost.
I have helped friends, family members, and forum users recover photos from dead phones dozens of times. The truth is, a phone being “dead” rarely means your data is gone. Your photos live on a storage chip inside the phone that is built to survive drops, water, and years of use. The problem is getting to that data when the phone won’t power up.
This guide walks you through how to recover photos from a phone that won’t turn on, starting with the easiest methods and moving to professional options. Whether you have an Android or iPhone, whether it suffered water damage or just stopped working one morning, there is a recovery path that applies to your situation.
The most important thing right now is to act methodically. Trying random fixes can make recovery harder, especially with water-damaged phones where corrosion spreads by the hour. Follow the steps below in order, and you will give yourself the best possible chance of getting those photos back.
Table of Contents
- Can You Actually Recover Photos from a Phone That Won’t Turn On?
- What ‘Dead Phone’ Actually Means for Your Photos
- How to Recover Photos from a Phone That Won’t Turn On: First DIY Steps
- How to Get Photos Off a Dead Phone via Cloud Backup
- Physical Storage Recovery: microSD Card Extraction
- What to Do When Your Phone Has Water Damage
- iPhone vs Android: How Recovery Differs
- When DIY Fails: Professional Phone Data Recovery
- How Much Does Phone Data Recovery Cost?
- What NOT to Do With a Damaged Phone?
- Your Recovery Decision Checklist
- FAQs
- Can you recover photos from a phone that won’t turn on?
- How to recover photos from dead phone without backup?
- How much does professional phone data recovery cost?
- How to recover photos from a water damaged phone?
- How to retrieve pictures from iPhone that won’t turn on?
- Can I recover photos from a phone with broken screen?
- Final Thoughts on Recovering Photos from a Dead Phone
Can You Actually Recover Photos from a Phone That Won’t Turn On?
Yes — in the vast majority of cases, you can recover photos from a phone that won’t turn on. Your photos are stored on a NAND flash memory chip inside the phone. This chip is one of the most durable components in any device. It survives screen damage, battery failure, cracked casings, and even moderate water exposure.
The confusion comes from mixing up two different things: the phone being dead and the storage being dead. When your phone won’t turn on, the power system, display, or logic board has failed. The storage chip where your photos live is almost always still intact. Think of it like a house with a broken front door — everything inside is fine, you just need another way in.
I have seen phones that were run over, dropped in lakes, and left in hot cars for hours. In every case where the owner went to a professional recovery service, the photos came back. The question is not usually “can it be done?” but “how much effort and money will it take?”
That said, there are a few scenarios where recovery becomes extremely difficult or impossible. A phone that has been exposed to saltwater for an extended period may have corrosion that has eaten through the storage chip connections. A phone that was factory reset before dying may have already wiped its data. And some severe board damage can make the storage chip unreadable even for professionals. But these are the exceptions, not the rule.
What ‘Dead Phone’ Actually Means for Your Photos
Not all dead phones are equally dead. Understanding what is actually wrong with your phone tells you which recovery method will work. Here are the most common scenarios:
Dead battery. The phone simply will not charge or hold power. This is the easiest scenario. The storage is completely fine. A replacement battery, a wireless charger, or a technician visit can bring the phone back long enough to pull your photos.
Broken or unresponsive screen. The phone is actually on — you can hear notifications or feel it vibrate — but the display shows nothing or does not respond to touch. Your photos are fully accessible. You just need an alternative way to interact with the phone, like connecting a mouse via USB OTG or mirroring to a computer.
Charging port failure. The port is damaged or corroded, so the phone cannot charge and eventually runs out of power. Wireless charging can often bypass a broken port. If that fails, a technician can replace the port or use an external power source.
Water damage. This is the most time-sensitive scenario. Liquid causes corrosion that spreads across the logic board within hours to days. The sooner you act, the better your chances. We cover this in detail in the water damage section below.
Boot loop or software crash. The phone tries to start but gets stuck restarting endlessly. This is often fixable through recovery mode or safe boot. Your photos are almost certainly intact.
Logic board failure. Something on the motherboard has failed — a power management IC, a blown capacitor, a cracked solder joint. The phone cannot boot. Recovery at this stage requires professional micro-soldering, but the storage chip itself is usually fine.
How to Recover Photos from a Phone That Won’t Turn On: First DIY Steps
Before you panic or start paying for anything, try these quick fixes. They sound too simple to work, but they solve a surprising number of “dead phone” cases.
Step 1: Force restart the phone. Every phone has a hard reset button combination that works even when the screen is black. For most Android phones, hold the power button and volume down button together for 10 to 20 seconds. For iPhone 8 and later, press and quickly release volume up, then volume down, then hold the side button until the Apple logo appears. For older iPhones with a home button, hold the home button and power button together for about 10 seconds.
Step 2: Try a different charger and cable. I cannot count how many times a “dead phone” turned out to be a broken cable or a faulty wall adapter. Use a cable you know works, plugged into a different power source. Try both a wall outlet and a USB port on a computer.
Step 3: Clean the charging port. Pocket lint and debris build up inside charging ports over time, preventing the phone from charging at all. Use a wooden toothpick or a clean toothbrush to gently remove any visible debris. Do not use metal objects — they can short the pins inside the port.
Step 4: Try wireless charging. If your phone supports wireless charging (most phones from the last several years do), place it on a wireless charging pad. This completely bypasses the charging port and can work even when the port is damaged or corroded.
Step 5: Leave it on the charger for 30 minutes. A completely drained battery sometimes needs time before the phone shows any signs of life. Walk away, come back in half an hour, and try turning it on again.
If any of these steps bring your phone back to life, immediately back up your photos. Copy them to a computer, upload to cloud storage, or transfer to another device. The phone may not stay alive for long, so do not waste the opportunity.
How to Get Photos Off a Dead Phone via Cloud Backup
Checking cloud backups should be your first real recovery step, not your last. Here is why: millions of people have automatic cloud sync enabled without realizing it. Your photos may already be safely stored online, and you can access them right now from any device with an internet connection. No recovery software, no technician, no cost.
Forum data backs this up. Across Reddit, Spiceworks, and Google support forums, the single most common success story is someone panicking about lost photos, signing into their cloud account on a laptop, and finding everything already there. It happens constantly.
For Android phones — check Google Photos:
Go to photos.google.com on any device and sign in with the Google account you used on your dead phone. If automatic backup was enabled (it is on by default on most Android phones), your photos will be there. Check the Library tab for photos organized by device. Also check your Google Drive, as some phones back up photos there as well.
For Samsung phones — also check Samsung Cloud:
Samsung devices have their own cloud backup. Visit cloud.samsung.com and sign in with your Samsung account. Look under Gallery to see if your photos were synced automatically.
For iPhones — check iCloud:
Go to icloud.com and sign in with your Apple ID. Click on Photos to see your entire iCloud photo library. If iCloud Photos was enabled on your iPhone, every photo you took should be there. You can also check by signing into iCloud on another Apple device with the same Apple ID.
Check other cloud services:
Many people have apps like Dropbox, OneDrive, or Amazon Photos set to automatically upload photos in the background. Log into each of these services and check for a camera uploads folder. You might be surprised by what was syncing without your knowledge.
Check Google Drive for iPhone backups:
If you backed up your iPhone to Google Drive, your photos may be stored there. Sign into drive.google.com and look for an iOS backup folder or check Google Photos from the same Google account.
If you find your photos in the cloud, congratulations — you are done. Download them, organize them, and breathe easy. If your photos were not backed up to any cloud service, move on to the physical recovery methods below.
Physical Storage Recovery: microSD Card Extraction
If your phone has a microSD card slot, this is one of the simplest and most overlooked recovery methods. Many Android phones — especially Samsung Galaxy models — allow you to expand storage with a microSD card. If you saved photos to the card, you can remove it and read it on any computer.
Step 1: Remove the microSD card. Depending on your phone model, the card slot is either on the side of the phone (using a SIM tray ejector tool or a paperclip) or under the back cover. Look for a small hole on the edge of the phone. Insert the ejector tool gently, and the tray will pop out.
Step 2: Insert the card into a computer. Most laptops have an SD card reader. You will need a microSD-to-SD adapter (these usually come free with microSD cards). If your computer does not have an SD card slot, you can use a USB card reader that costs a few dollars.
Step 3: Copy your photos. The card will appear as a removable drive on your computer. Navigate through the folders — photos are typically stored in a folder called DCIM (Digital Camera Images) or Pictures. Copy everything you need to your computer.
One important note: by default, many Android phones store photos on the phone’s internal storage, not the SD card. If you never changed your camera settings to save to the SD card, this method may not yield your photos. Still, it takes two minutes to check and costs nothing.
Even if the phone itself is completely dead, the microSD card is independent. It does not need the phone to work. As long as the card is physically intact, you can read it on any device that accepts microSD.
What to Do When Your Phone Has Water Damage
Water damage is the most urgent phone recovery scenario. Every hour counts. Unlike a dead battery or cracked screen, water damage is progressive — it gets worse over time as corrosion spreads across the logic board and eats into component connections.
Here is what happens inside a water-damaged phone. When liquid reaches the logic board, it creates electrical bridges between components that should be separated. This causes short circuits. As the liquid dries, it leaves behind mineral deposits and corrosion that continue to spread and damage connections even after the phone appears dry. Within 24 to 48 hours, corrosion can make recovery significantly harder. Within a week, it may be nearly impossible.
What to do immediately:
First, do not turn the phone on. Do not press the power button. Do not plug it in. Every time you apply power to a wet phone, you risk causing additional short circuits that can destroy the storage chip connections.
Remove the case, SIM card, and microSD card if your phone allows it. This gives trapped moisture more escape routes.
If the phone has a removable battery, take it out immediately. This cuts power and reduces the risk of further short-circuiting.
Get the phone to a professional recovery service as fast as possible. Tell them it is water damaged and that you need photos recovered. They will disassemble the phone, clean the logic board with specialized solutions to stop corrosion, and attempt to power the storage chip directly.
The rice myth — do not do this:
You have probably heard that putting a wet phone in a bag of rice will save it. This is widely repeated advice that professionals consistently warn against. Rice does not absorb moisture fast enough to matter. Worse, rice dust and debris can get into the phone’s ports and openings, causing additional contamination. The time you waste with rice is time corrosion uses to spread.
If you absolutely must try a desiccant method before getting professional help, use silica gel packets (the kind that come in shoe boxes and electronics packaging). They absorb moisture far more effectively than rice. But the real answer is to skip home remedies and get the phone to a technician.
Do not use a hair dryer or heat gun. Heat can warp the logic board, melt adhesive, and push liquid deeper into the phone. It can also damage the storage chip itself. Room temperature air drying is the only safe approach if you must wait.
iPhone vs Android: How Recovery Differs
The phone you have affects which recovery options are available to you. iPhones and Android phones handle storage, encryption, and backups differently, which means the recovery process is not the same for both.
Android phones generally offer more DIY recovery paths. Many have microSD card slots for direct storage extraction. USB debugging mode can sometimes be used to pull data from a phone that will not fully boot. And Android’s file system is more accessible when connected to a computer via USB.
iPhones are more locked down. There is no microSD card slot on any iPhone. The storage is soldered to the logic board and protected by hardware encryption tied to the Secure Enclave. This means you cannot simply remove the storage and read it elsewhere — the data is encrypted with keys that live on the same board. For iPhones, cloud backup (iCloud) is by far the most reliable recovery path.
Here is how the two compare across key recovery factors:
| Recovery Factor | Android | iPhone |
|---|---|---|
| Cloud backup (default) | Google Photos (often on by default) | iCloud Photos (requires enable) |
| microSD card extraction | Available on many models | Not available |
| USB debugging access | Possible if enabled | Not available |
| Storage encryption | File-based, key on device | Hardware-level via Secure Enclave |
| Professional difficulty | Moderate (more access points) | Higher (tight encryption integration) |
| Recovery software effectiveness | Can work if phone connects | Rarely effective (encryption) |
The bottom line: if you have an iPhone, cloud backup is your best friend. If iCloud did not sync your photos, you will almost certainly need professional logic board repair. If you have an Android phone, you have more options to try at home before paying for professional help.
When DIY Fails: Professional Phone Data Recovery
If you have tried force restarts, cloud backups, microSD extraction, and charging alternatives, and none of them worked, it is time to consider professional recovery. This is not a failure — it just means the phone needs hardware-level intervention that you cannot do at home.
Professional recovery labs use techniques that require specialized equipment and years of training. Here is what actually happens when you send a dead phone to a recovery service:
Diagnostic evaluation. The technician examines the phone under a microscope to identify what failed. They check for corrosion, cracked solder joints, blown capacitors, and burned-out components. This evaluation is usually free.
Logic board repair (micro-soldering). If the phone’s logic board has failed, the technician uses a microscope and precision soldering tools to repair or replace damaged components. This can include reballing chips (removing a chip, cleaning the old solder, applying new solder balls, and reattaching it), replacing a failed power management IC, or repairing cracked traces on the board.
Chip-off recovery. In severe cases where the logic board cannot be repaired, the technician may remove the NAND flash storage chip from the board entirely. They then read the chip using specialized NAND readers. This is the most invasive technique and requires extreme precision — the chip must be heated to exact temperatures to be removed without damage.
Decryption challenge. For iPhones, even after chip-off extraction, the data is encrypted with keys stored in the Secure Enclave. Professional services must repair enough of the board to boot the Secure Enclave and decrypt the storage. This is why iPhone recovery is generally more expensive and complex than Android recovery.
What to look for in a recovery service:
Choose a service that offers a “no data, no charge” guarantee. This means you only pay if they successfully recover your photos. Reputable labs include this as standard practice. Avoid any service that demands payment upfront before attempting recovery.
Ask whether they do the work in-house or send it to a partner lab. In-house work is faster and gives you more direct communication about progress.
Look for experience with your specific phone model. A lab that has recovered hundreds of your phone model will know the common failure points and the fastest repair path.
How Much Does Phone Data Recovery Cost?
Cost is one of the biggest sources of anxiety for people with dead phones. Forum posts are full of people who avoided professional help because they assumed it would cost thousands of dollars. In reality, the price range is more manageable than most people expect.
Here is what you can generally expect to pay based on the type of damage:
Software-level recovery (boot loop, software crash): This is the least expensive scenario. If a technician can recover your photos through software tools without opening the phone, expect to pay around $100 to $300. Many shops offer this as a basic service.
Component-level repair (charging port, battery replacement): If the fix is replacing a failed component like a charging port or battery, costs typically range from $50 to $200 including labor. Once the phone powers on, you can pull your photos yourself.
Logic board repair (micro-soldering): When the motherboard needs component-level soldering repair, costs range from $200 to $500. This covers the diagnostic work, microscope repair time, and testing.
Chip-off or severe damage recovery: The most complex recovery scenarios — where the storage chip must be removed and read independently, or where extensive corrosion cleanup is needed — can cost $500 to $1,500. iPhone recovery tends toward the higher end due to encryption challenges.
Water damage recovery: Expect $200 to $800 depending on how far corrosion has spread. Acting quickly keeps costs down. A phone treated within 24 hours of water exposure is usually far cheaper to recover than one that sat wet for a week.
These ranges vary by service, location, and phone model. Always get a free diagnostic quote before committing. And remember — a “no data, no charge” guarantee means there is zero financial risk to finding out whether recovery is possible.
What NOT to Do With a Damaged Phone?
Sometimes the biggest threat to your photos is not the damage itself but the well-meaning attempts to fix it. Here are the things you should never do with a dead or damaged phone:
Do not put it in rice. As explained in the water damage section, rice does not work and wastes precious time. Use silica gel if anything, but get professional help instead.
Do not keep trying to turn it on. Every power-on attempt on a damaged phone risks additional damage. If it did not turn on the first three times, the fourth attempt will not help and could hurt.
Do not charge a wet phone. Applying power to a phone with liquid inside is the fastest way to permanently destroy it. The resulting short circuits can fry the storage chip itself.
Do not use a hair dryer, oven, or microwave. Heat damage is irreversible. Microwaving a phone will destroy it instantly and is also a fire hazard.
Do not shake or tap the phone. This is a surprisingly common suggestion in forums. It does not help and can cause physical damage to delicate internal components.
Do not attempt to open the phone yourself. Modern phones are held together with strong adhesive and tiny screws. Opening one without proper tools and knowledge usually results in torn flex cables, broken clips, and additional damage that makes professional recovery harder and more expensive.
Do not run random recovery software. Software tools cannot read a phone that will not power on, no matter what their marketing claims. They can only work if the phone connects to a computer and is recognized. If your phone does not turn on at all, software is not your answer.
Your Recovery Decision Checklist
Use this checklist to work through your situation step by step. Move to the next option only if the previous one did not work:
1. Check cloud backups first. Sign into Google Photos, iCloud, Samsung Cloud, Dropbox, OneDrive, and Amazon Photos from another device. This costs nothing and resolves a huge percentage of cases.
2. Try force restart and alternative charging. Use a different cable, clean the port, try wireless charging. These take five minutes and frequently work.
3. Remove the microSD card if applicable. Pop it into a computer card reader and check the DCIM folder. Two minutes of effort for a possible win.
4. Try an OTG adapter with a mouse. If the screen is cracked but the phone is on, a USB OTG adapter lets you connect a mouse to navigate the phone and copy photos to a USB drive.
5. If water damage, go professional immediately. Do not pass go. Do not try rice. Every hour of delay reduces your chances.
6. Seek professional recovery. If nothing above worked, find a reputable lab with a no-data-no-charge policy. Get a free diagnostic quote and decide based on the cost relative to the value of your photos.
FAQs
Can you recover photos from a phone that won’t turn on?
Yes, in most cases your photos are still recoverable. Photos are stored on a durable NAND flash memory chip inside the phone that typically survives screen damage, battery failure, and water exposure. The fastest method is checking cloud backups like Google Photos or iCloud. If no backup exists, professional recovery services can repair the logic board or read the storage chip directly.
How to recover photos from dead phone without backup?
If you have no cloud backup, start with physical methods: try a force restart, alternative charging, or microSD card extraction. If the phone still will not power on, a professional recovery service can perform logic board repair through micro-soldering or remove the NAND storage chip for direct reading. Costs typically range from $200 to $1,500 depending on the damage type.
How much does professional phone data recovery cost?
Professional recovery costs vary by damage type. Software-level recovery runs $100 to $300. Component repair like battery or port replacement costs $50 to $200. Logic board micro-soldering ranges from $200 to $500. Chip-off recovery for severe damage can cost $500 to $1,500. Most reputable services offer a free diagnostic and a no-data-no-charge guarantee.
How to recover photos from a water damaged phone?
Act immediately. Do not turn the phone on, do not charge it, and do not put it in rice. Remove the case and any cards, then take it to a professional recovery service right away. Corrosion from water damage spreads within hours, so speed is critical. A lab will clean the logic board with specialized solutions and attempt to power the storage chip directly.
How to retrieve pictures from iPhone that won’t turn on?
First check iCloud by signing in at icloud.com and looking in the Photos section. If iCloud Photos was enabled, everything should be there. If not, iPhone recovery is harder than Android because storage is encrypted through the Secure Enclave and soldered to the logic board. You will need a professional service that specializes in iPhone logic board repair to boot the Secure Enclave and decrypt the storage.
Can I recover photos from a phone with broken screen?
Yes. A broken screen does not mean lost photos because the phone is often still running. If the phone turns on but the screen is unresponsive, connect a USB OTG adapter with a mouse to navigate the interface and copy photos. You can also mirror the phone to a computer using software like Samsung Smart Switch or third-party mirroring tools. Cloud backup remains the easiest option if sync was enabled.
Final Thoughts on Recovering Photos from a Dead Phone
When your phone dies, the photos inside are almost always still there. Start with the easy wins: check your cloud backups first, because that resolves more cases than any other method. Try force restarts, alternative chargers, and microSD extraction before spending money on anything.
If those do not work, professional recovery is a real option with a realistic price range. And if your phone has water damage, skip everything else and get professional help immediately — time is the one factor you cannot get back.
Once you have your photos recovered, set up automatic cloud backup on your new phone today. It takes two minutes and means you never have to go through this stress again. The best recovery method is the one you never need to use.