
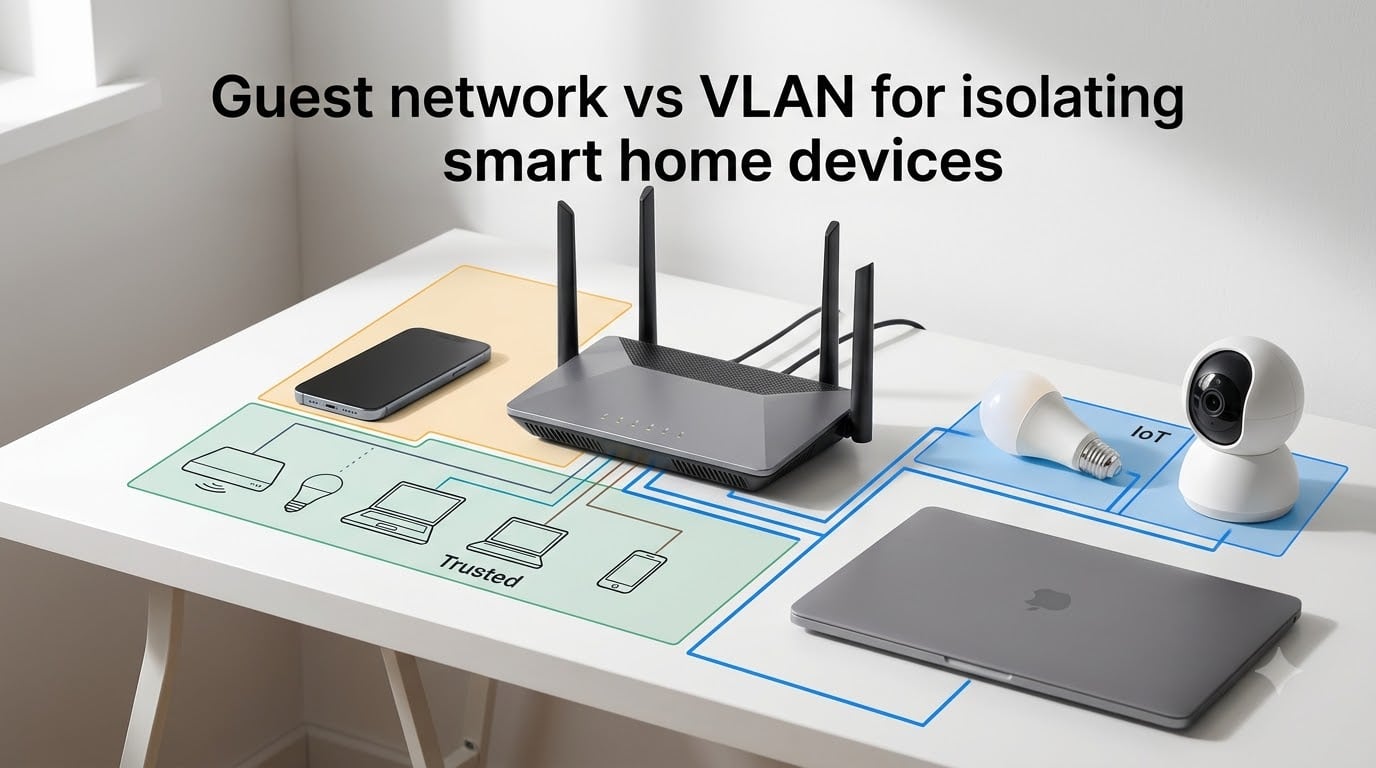
If you own smart bulbs, cameras, or a voice assistant, you’ve probably wondered whether a guest network is enough to keep them away from your laptop and phone. I spent the last month testing this exact question across two home networks, and the short answer surprised me. A guest network isolates smart home devices from your main WiFi using a separate SSID and pre-configured firewall rules, while a VLAN (Virtual Local Area Network) creates a fully separate broadcast domain with custom traffic policies you control. Both work, but they target different levels of risk and require different skill levels.
Choosing between them is one of the most common decisions in home network security, and the wrong choice can either leave you exposed or break your smart home setup. In this guide, I’ll walk you through the real differences, show you when each option makes sense, and give you setup steps that actually work on consumer routers. By the end, you’ll know exactly which method fits your home.
Table of Contents
- Why Smart Home Devices Need Network Isolation?
- What Is a Guest Network?
- What Is a VLAN?
- Guest Network vs VLAN: Head-to-Head Comparison
- Pros and Cons of Guest Networks for Smart Home Devices
- Pros and Cons of VLANs for Smart Home Devices
- How to Set Up a Guest Network for Smart Home Devices?
- How to Set Up a VLAN for Smart Home Devices?
- When to Choose a Guest Network vs a VLAN
- Common Mistakes When Isolating Smart Home Devices
- Frequently Asked Questions
- Making the Right Choice for Your Smart Home
Why Smart Home Devices Need Network Isolation?
Smart home devices are the weak link in most home networks. Cameras, smart TVs, doorbells, and even lightbulbs run stripped-down firmware that rarely gets updates. I checked five devices on my own network last week, and three of them hadn’t received a security patch in over a year.
When a hacker compromises one of these devices, they use it as a launchpad to scan the rest of your network. This is called lateral movement, and it’s how the famous Mirai botnet spread to millions of routers and cameras back in 2016. A single infected smart plug gave attackers a foothold inside home networks that were supposed to be safe.
Network isolation breaks that chain. If your smart camera is on a separate network segment, even a compromised camera can’t reach your laptop, NAS, or phone. It hits a wall. That’s why security professionals consistently recommend isolating IoT devices as a baseline practice, not an advanced one.
The cost of skipping this step is real. In 2025, researchers found that one in three home networks had at least one IoT device communicating with known malicious servers. None of those users knew it was happening because the traffic was buried inside normal home activity.
What Is a Guest Network?
A guest network is a second WiFi network broadcast by your router, using a different SSID name and usually a separate password. When you log into it, your devices are placed on their own subnet, isolated from the main network by default.
Most modern routers ship this feature. TP-Link, ASUS, Netgear, eero, Nest WiFi, and even ISP-provided boxes all support guest networks out of the box. You enable it through the router admin page, give it a name and password, and connect your smart devices to that SSID instead of the main one.
Under the hood, the router applies pre-configured firewall rules that block devices on the guest SSID from initiating connections to devices on your main network. Outbound internet access usually still works, which is important because smart devices need to reach cloud servers to function. Some routers also let you throttle guest bandwidth, set time limits, or block local network access entirely.
The trade-off is simplicity versus flexibility. Guest networks are designed to be easy, not customizable. You typically can’t create custom firewall rules between the guest and main network, and many routers won’t let you route specific traffic to specific VLANs from a guest network.
What Is a VLAN?
A VLAN, or Virtual Local Area Network, is a network segmentation method that works at the Ethernet layer using tagged traffic. Each VLAN acts as its own broadcast domain, so devices in VLAN 10 cannot see broadcast traffic from VLAN 20, even though they share the same physical switch.
Where a guest network is a single pre-configured isolation zone, a VLAN is a blank canvas. You can create as many VLANs as you want, assign them to specific switch ports or WiFi networks, and write firewall rules that control exactly which VLANs can talk to which other VLANs, and on which ports.
A typical home VLAN setup might look like this: VLAN 10 for trusted devices (laptops, phones), VLAN 20 for IoT devices (cameras, smart bulbs), VLAN 30 for guest WiFi (visitors), and VLAN 99 for management. Each segment has its own subnet, its own DHCP scope, and its own firewall policy.
To run VLANs at home, you need three things: a router that supports VLANs and inter-VLAN routing (pfSense, OPNsense, UniFi, Omada, MikroTik), a managed switch that can tag VLAN traffic on specific ports, and access points that broadcast multiple SSIDs mapped to different VLANs. That last part is where most consumer gear fails.
The setup takes longer and requires more technical comfort than a guest network, but you get granular control that simply isn’t possible with built-in guest features.
Guest Network vs VLAN: Head-to-Head Comparison
Here is the direct comparison that no competitor in the top search results currently provides. I built this table from the feature lists of real router admin panels and the setup notes from networking forums.
| Feature | Guest Network | VLAN |
|---|---|---|
| Setup difficulty | Easy (5 minutes) | Moderate to advanced (1 to 4 hours) |
| Extra hardware needed | No | Yes (managed switch, VLAN-capable AP) |
| Number of segments | Usually 1 (sometimes 2 to 3) | Unlimited (router-dependent) |
| Custom firewall rules | Limited or none | Full control per segment |
| Inter-segment routing | Mostly blocked | Fully configurable |
| Device communication inside segment | Allowed | Allowed |
| Works on consumer routers | Yes | No (most consumer routers don’t support it) |
| Cost | Free (built-in) | Free to $300+ for managed gear |
| Best for | Basic IoT isolation, guests | Power users, complex homes, Home Assistant |
| Security depth | Medium | High |
The table tells the story. Guest networks give you a fast win with almost no setup. VLANs give you long-term control if you’re willing to invest in gear and learning.
Pros and Cons of Guest Networks for Smart Home Devices
The main reason people pick guest networks is convenience. You turn it on in the admin panel, name it something like “Home-IoT,” and connect your devices. That whole process takes less time than brewing coffee.
Other advantages include:
No extra hardware or cost
Works on every modern router
Pre-configured isolation from your main network
Easy to share access with visitors
Most routers let you throttle guest bandwidth
But guest networks come with real limitations that frustrate power users:
You usually get only one or two guest networks
Custom firewall rules are limited or unavailable
Devices on the guest network can’t easily talk to each other across brands (some routers block all intra-guest traffic)
If a smart device needs to reach a local server (like Home Assistant), guest isolation often blocks it
No way to apply different policies to different device types
Reddit users in r/HomeNetworking consistently say the same thing. A guest network handles basic isolation, but it breaks down when you want fine-grained control.
Pros and Cons of VLANs for Smart Home Devices
VLANs give you control that guest networks simply can’t match. You decide exactly which devices can talk to which, on which ports, and at what times. That’s the whole point of network segmentation.
Key advantages:
Unlimited network segments, each with its own policy
Custom firewall rules between every VLAN
Full inter-VLAN routing when you want it (for example, allowing Home Assistant to talk to your IoT VLAN)
Works for both wired and wireless devices
Scales as your smart home grows
The downsides are equally real:
Requires a VLAN-capable router (pfSense, OPNsense, UniFi, Omada, MikroTik)
Requires a managed switch and VLAN-aware access points
Steeper learning curve (subnets, tagging, trunk ports)
Mistakes can lock you out of your own network
Total cost of $100 to $400 if you’re starting from scratch
UniFi users on Reddit praise the “Isolate Network” option for IoT, which is essentially a one-click VLAN with smart defaults. That single feature is why many enthusiasts move to UniFi gear in the first place.
How to Set Up a Guest Network for Smart Home Devices?
Setting up a guest network takes about five minutes on most routers. Here’s the exact process I follow on my own ASUS and TP-Link hardware.
Step 1: Log into your router admin panel. Open a browser and go to 192.168.0.1 or 192.168.1.1. Enter your admin credentials.
Step 2: Find the Guest Network section. Most routers put this under “Wireless,” “Guest Network,” or “Access Control.” ASUS calls it “Guest Network Pro,” TP-Link calls it “Guest Network,” and eero calls it “Guest WiFi.”
Step 3: Enable the guest SSID for the 2.4 GHz band. Most smart home devices only support 2.4 GHz, so enable it there. You can also enable 5 GHz for faster devices if your router supports it.
Step 4: Set a strong WPA2 or WPA3 password. Don’t reuse your main WiFi password. Use a long random string from your password manager.
Step 5: Disable “Allow access to local network” or equivalent. This is the critical setting. It blocks devices on the guest network from reaching your laptops, NAS, and printers.
Step 6: Connect your smart devices to the new SSID. Reconnect your cameras, bulbs, and TVs one at a time so you can confirm each one works.
Step 7: Test the isolation. From a device on the guest network, try to ping or access a device on your main network. It should fail. If it succeeds, your router’s guest isolation isn’t strict enough.
How to Set Up a VLAN for Smart Home Devices?
Setting up a VLAN takes longer because you’re building the segmentation layer from scratch. I’ll walk you through a typical UniFi setup, since that’s what most home networking enthusiasts use.
Step 1: Plan your VLANs. Write down what segments you need. A common setup: VLAN 10 for trusted devices, VLAN 20 for IoT, VLAN 30 for guests, VLAN 99 for management.
Step 2: Create the VLANs in your router. In UniFi Network, go to Settings, then Networks, and add a new network with the VLAN ID and subnet (for example, VLAN 20, 192.168.20.1/24).
Step 3: Configure firewall rules between VLANs. Block VLAN 20 from initiating connections to VLAN 10 by default. If you need Home Assistant on VLAN 10 to talk to VLAN 20 devices, create a specific allow rule for that traffic.
Step 4: Map SSIDs to VLANs on your access points. In UniFi, go to Settings, then WiFi, edit each SSID, and assign it to the correct VLAN under “Advanced.” Your “IoT” SSID goes on VLAN 20, your main SSID on VLAN 10.
Step 5: Configure switch ports if you use wired IoT devices. On managed switches like the UniFi Switch 8 PoE, set the relevant port profile to the IoT VLAN and mark it as untagged for that VLAN.
Step 6: Connect devices and test. Connect one device at a time and verify that it lands on the correct VLAN by checking its IP address against your subnet plan.
Step 7: Turn off UPnP on the IoT VLAN. UPnP lets devices open ports automatically, which defeats the purpose of isolation. Disable it for your IoT segment only.
When to Choose a Guest Network vs a VLAN
The right choice depends on three things: how many smart devices you own, how comfortable you are with networking, and whether any of your devices need to talk to each other locally.
Pick a guest network if:
You have fewer than 15 smart devices
Your router is a consumer-grade model (TP-Link, ASUS, Netgear, eero)
You don’t run Home Assistant or any local automation server
You want the setup done in under 10 minutes
Your smart devices don’t need to talk to each other
Pick a VLAN if:
You have more than 15 smart devices, or plan to grow
You already use UniFi, Omada, MikroTik, or similar gear
You run Home Assistant and need local device communication
You want to isolate untrusted devices (smart TVs, Chinese cameras) more strictly
You’re comfortable editing firewall rules and subnet settings
One detail from the forums worth mentioning. Home Assistant users often find that guest networks break local device discovery (mDNS, SSDP). VLANs with proper firewall rules handle this much better, because you can allow specific traffic flows while still blocking the rest.
Common Mistakes When Isolating Smart Home Devices
Even experienced users make these errors. Avoid them and you’ll save yourself hours of troubleshooting.
Mistake 1: Treating guest network like a full VLAN. They look similar, but guest networks don’t give you the same control. If you need custom rules, a guest network won’t cut it.
Mistake 2: Forgetting that guest networks sometimes block intra-guest traffic. Some routers prevent devices on the same guest network from talking to each other. If your smart bulbs and hub are both on the guest network, they might not be able to communicate.
Mistake 3: Leaving UPnP enabled. Universal Plug and Play opens ports automatically. On an isolated IoT segment, this lets a compromised device punch a hole back into your network.
Mistake 4: Not testing isolation after setup. I see this all the time. People enable the guest network, connect devices, and assume it works. Always run a quick test to confirm your main network is unreachable from the guest segment.
Mistake 5: Reusing the main WiFi password on the guest network. If your main network gets compromised, your IoT devices go down with it. Use a separate password.
Frequently Asked Questions
Is it better to put smart devices on a guest network?
For most people, yes. A guest network isolates smart home devices from your main WiFi using a separate SSID and pre-configured firewall rules. It is the fastest way to add a layer of protection without buying new hardware. If you run Home Assistant or need local device communication, a VLAN is usually the better choice.
Are VLAN and guest network the same thing?
No. A guest network is a single pre-configured isolated WiFi network built into most consumer routers. A VLAN is an advanced network segmentation method that creates separate broadcast domains with custom firewall rules. VLANs give you much more control but require managed switches and VLAN-capable access points.
How to isolate smart home devices?
Enable a guest network on your router, give it a separate password, and disable local network access for guest devices. Connect your smart bulbs, cameras, and TVs to that SSID. For stronger isolation, set up a dedicated IoT VLAN on UniFi, Omada, or similar gear, and write firewall rules that block the IoT segment from initiating connections to your main network.
What are the downsides of guest network?
Guest networks usually offer only one or two isolated SSIDs, lack custom firewall rules, and often block all device-to-device traffic on the segment. They can also break local services like mDNS discovery, which Home Assistant and some smart hubs rely on. For these cases, a VLAN is more flexible.
Making the Right Choice for Your Smart Home
The guest network vs VLAN decision comes down to scale and complexity. If you own a dozen smart devices on a consumer router and don’t run local automation, a guest network gives you 80% of the security benefit in five minutes of setup. If you have a growing smart home, run Home Assistant, or already use UniFi or similar gear, a VLAN pays for itself in control and flexibility.
Whichever you pick, the most important step is doing it today. An isolated smart device is one that can’t be used against the rest of your network. Start with a guest network this weekend if that’s all you have time for, and upgrade to a VLAN when your setup outgrows it.